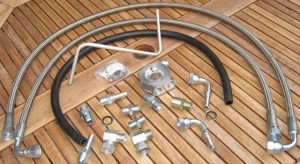
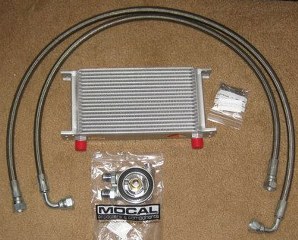
 The Toyota AE86 was never fitted with an oil cooler as standard. Popularly used for drifting (high power and low speed) the addition of an oil cooler is a sensible upgrade. An after market oil cooler kit is available for the AE86 but it is designed for cars without air conditioning or power steering. The air conditioning compresssor and power steering pump are both in the way on the natural route. Here is the bare kit as supplied.
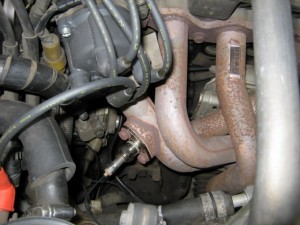 Here is the engine bay. The oil filter is buried under number 2 cylinder. The restrictions are the exhaust (all around), the chassis below, the starter motor rearward and the air conditioning compressor and power steering pump forward. There is no way the standard kit will fit as supplied in any shape or form. Time for a rethink, it’s all a bit tight in there……
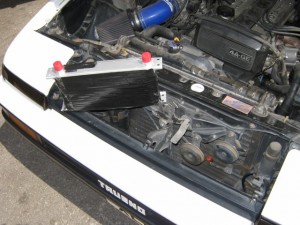 Back to that later. First the easy bit, mounting the heat exchanger. If at all possible I wanted to modify as little as possible on the car and pickup on existing mountings. There’s plenty of front to back depth between the grille and the radiator but the height is dictated by the various brackets.
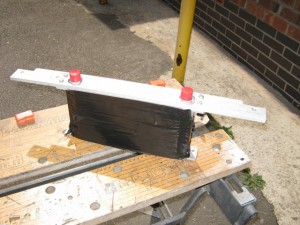 Here’s the top mount manufactured from aluminium flat bar. A holesaw was used to cut the holes for the ports. The holes for the mounting onto the car are positioned to pick up on existing fixings (no modifications were made to the car at all).
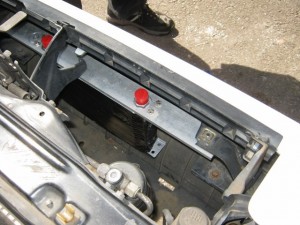 And here it is fitted to the car. Thin straps were later made to pickup on the lower mounting holes on the heat exchanger which were subsequently attached to the existing fixing point on the lower right of this picture.
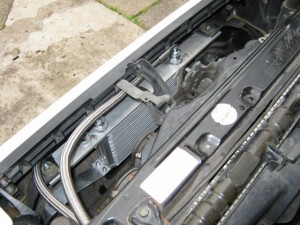 Here you can see the lower straps that attach to the lower mounting bracket and onto existing fixings on the chassis. Two large holes were cut near to the battery to allow the pipes and fittngs to be passed through. Rubber grommets were then fitted to protect the stainless steel overbraid of the hydraulic hoses.
After a lot of measuring up and researching hydraulic fitting dimensions and bending up dummy pipes, I ended up with a shopping list and bought some loose hose fittings and a temporary piece of hydraulic hose to get dimensions.
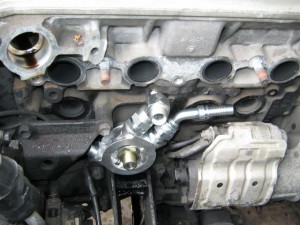 After a couple of redesigns (it really is tight in there!) a final solution was found. On the sandwich plate using a compact male/female elbow on the top connection and a swept 45 degrees hose fitting on the lower connection it was possible to get both hoses back towards the bulkhead and from there the originally supplied hoses can be used to connect to the heat exchanger.
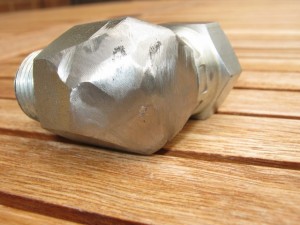 It’s not that simple though! The compact elbow needed relieving to miss the block. These fittings are rated at 10,000 psi and have an enormous wall thickness, we are using these at a maximum of maybe 100psi. By measuring the drilling depth it was possible to work out that we could safely relieve the compact elbow sufficiently enough to clear the block.
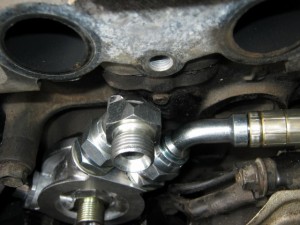 Here you can see why it needs to be relieved. The angle of the sandwich plate is restricted by a small screw that goes into the block. Also by elimination I needed to fit a 45 degree swept elbow on the lower connection, so that set the angle for the plate.
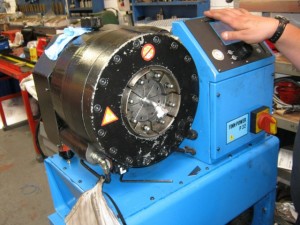 Once the final solution was found, and the final lengths established, the fittings could be swaged onto the hydraulic hoses. This is the swept 45 degree fitting being swaged onto the hose at Pirtek Manchester. The hose used was Pirtek’s Hitemp 305, a PTFE spiral wound inner hose with a stainless steel overbraid.
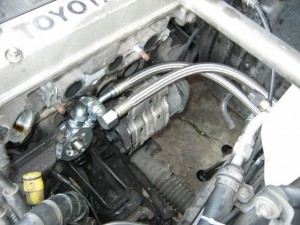 And here are the new hoses fitted to the sandwich plate. They feed behind the exhaust manifold and into the corner of the engine bay where they join (with 90 degree elbows) onto the supplied hoses.
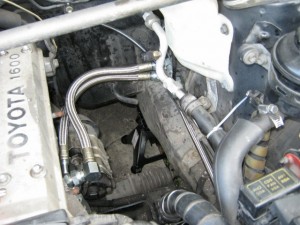 And here you can see how the hydraulic hoses are clear the exhaust manifold and feed into the corner of the engine bay. You can see where the new short hoses end and join with 90 degree elbows.
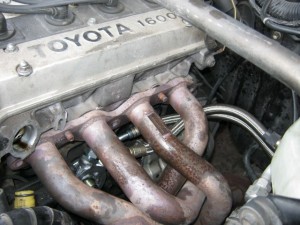 And here is the installation with the exhaust manifold fitted. All that was left to do was to fit the oil filter and the distributor (which had been marked up). The spark plugs were removed and the engine cranked until oil pressure was seen on the gauge and then the oil level was topped up and the spark plugs fitted. The project was finished just in time, the car was out on track on Anglesey the following day.


